
Are you tired of dealing with buzz and intonation issues on your guitar? Have you been putting off refretting because it seems like a daunting task? Well, I’m here to tell you that refretting a guitar is not as difficult as it may seem. As someone who has been playing guitar for years and has gone through the process of refretting multiple times, I can assure you that with the right tools and technique, anyone can do it like a pro!
In this step-by-step guide, we’ll go through the entire process of how to refret a guitar in detail. From removing the old frets to installing new ones and everything in between, I’ll share all my tips and tricks to make this task easier for you. By the end of this article, you’ll feel confident enough to tackle any refretting job on your own! So grab your tools and let’s get started on giving your beloved guitar a much-needed makeover.
So, how to refret a guitar?
Refretting a guitar is a process that involves replacing the frets on the neck of the guitar. This may be necessary if your current frets are worn out or damaged, causing issues with intonation and playability. While it can seem like an intimidating task, with the right tools and techniques, you can refret your guitar like a pro.
Step 1: Gather Materials
Before starting the refretting process, make sure you have all the necessary materials. This includes new fretwire, a hammer or mallet, wire cutters, sandpaper or files for leveling and shaping the frets, and super glue.
Step 2: Remove Old Frets
Using wire cutters or pliers, carefully remove each old fret one at a time. Be cautious not to damage the wood underneath as this will affect how well your new frets will sit.
Step 3: Clean The Fretboard
Once all old frets are removed, use sandpaper to clean any residue left behind on the fretboard. This will ensure smooth placement of your new frets.
Step 4: Measure And Cut New Frets
Measure each section of your guitar’s neck where you removed old frets to determine how long each new piece should be. Use wire cutters to trim them accordingly.
Step 5: Hammer In New Frets
Place each new piece of pre-cut wire onto its designated spot on the neck and gently tap it in place using a hammer or mallet. Make sure they are flush against the wood for proper positioning.
Step 6: Level And Shape Frets
Using sandpaper or files designed specifically for leveling and shaping guitar fretwire, carefully shape each individual piece until they are even with one another and smoothly rounded at their edges.
Step 7: Reattach Strings And Test Playability
Once all new pieces have been leveled and shaped correctly, reattach strings to the guitar and test its playability. Make any necessary adjustments to ensure proper intonation.
Step 8: Glue Frets In Place
Finally, use a small amount of super glue to secure each fret in place. This will prevent them from popping out or shifting while playing.
Congratulations, you have successfully refretted your guitar like a pro! With practice and patience, this process can become easier and more efficient over time. Remember to take your time and pay close attention to detail for the best results. Happy playing!
Understanding the Basics of Guitar Refretting: Tools and Materials Needed
Guitar refretting is a process all guitar enthusiasts must eventually come to know. Sometimes we wish our stringed companion could sing forever – but with time, frets wear down and require replacement to maintain the sweet melodies we so cherish.
To embark on this journey of renewal, you’ll need a few essential tools in your kit.
The Fret Puller: This special tool makes the task of removing old frets a breeze. It’s designed to easily slide under each fret wire without damaging the wood of your guitar. Having a good quality fret puller is key; skimping out here could lead to unnecessary damage and extra work. A smooth job begins with smooth tools.
In addition, there are items that may seem commonplace yet hold great value in this undertaking. This includes:
- A Soldering Iron: Remarkably useful for heating up frets and making removal easier.
- Fine Grit Sandpaper: For smoothing any rough patches left behind after removal.
- New Frets: Of course! You can’t replace something without having its successor ready for installation.
Now let’s delve deeper into some more specialized equipment needed for professional refretting purposes.
The fret press, though it might seem intimidating at first glance, is an absolute marvel when it comes to installing new ones properly on your beloved instrument! Shaped much like an oversized clamp, it exerts precise pressure assuring optimal placement.
A dose of patience, though not purchasable nor tangible fits snugly within our list too! Refretting isn’t just about switching parts like Lego blocks; it’s akin to performing surgery on your six-string partner – hence why such delicacy should be taken throughout the process. Grip the guitar with care, as if it were a precious jewel.
Finally, and perhaps surprisingly so: rubber bands. They’re not just for keeping your hair in check! In this scenario they help maintain frets’ position while glue sets – an uncomplicated yet undeniably helpful tool.
With these tools at your disposal, you’re ready to breathe new life into your musical mate! It’s time to roll up those sleeves and get strumming on some repair tunes. Happy refretting!
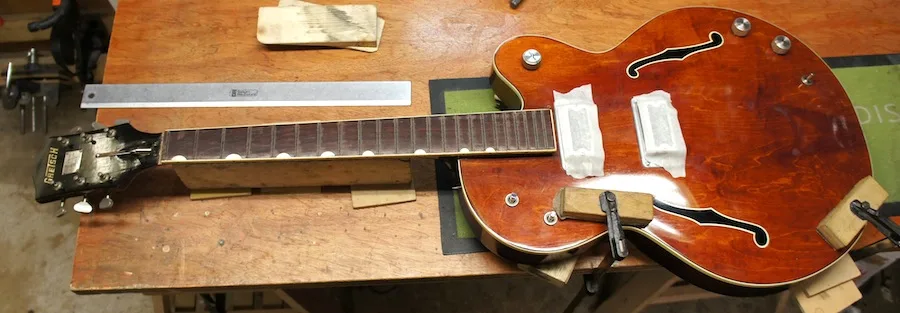
Step-By-Step Process to Remove Old Guitar Frets Safely
Preparing for Fret Removal
First things first, take a deep breath and prepare yourself. Removing old guitar frets might seem daunting but with patience and a bit of practice, it can become an easy task. Start by loosening the strings on your guitar until they’re slack enough to move aside easily – you’ll be thankful you did this step when it’s time to actually remove the frets. Invest in some quality tools; a good pair of wire cutters or nippers and a soft hammer are essential pieces every guitarist should have in their toolbox.
The Fret Removal Process
Once all the prep work is done, let’s dive into the meat and potatoes of removing those pesky old frets.
- Begin at one end: Choose either side of the neck to start from, but remember consistency is key so stick with that side as you progress down.
- Gentle Pressure: Using your wire cutters (or fret pullers if preferred), gently apply pressure underneath each end of the fret, effectively lifting them out piece by piece. Do not yank or force them out! Treat your instrument kindly.
- Clean Up: Once all frets are removed, there may be residual glue left behind which needs cleaning up. A simple cloth lightly dampened with rubbing alcohol does wonders here without damaging the wood.
Remember: Practice makes perfect! With patience and care, anyone can safely remove old guitar frets without causing harm to their beloved instrument.
Read also: how to refret a guitar
Choosing the Right Frets for Your Guitar: Types and Sizes
Choosing the Right Frets for Your Guitar: There’s more to a guitar than just its body and strings. One of the most critical parts is often overlooked – the frets. These are small metal bars embedded along the neck, aiding in creating different tones when you press down on the strings. The type and size of frets you opt for can alter your playing style significantly, so making an informed decision is vital.
In choosing your guitar frets, one aspect to consider is type. Broadly speaking, two dominant types exist – T-shaped and bar shaped. T-shaped frets are traditional and widely utilized due to their easy installation process; they have a lip at the bottom that grabs onto slits cut into the fingerboard. On the other hand, bar-shaped (also known as jumbo) are larger in size providing greater control over bending notes but require more effort during installation.
- T-Shaped Frets: Ideal for beginners due to ease of installation.
- Bar Shaped/Jumbo Frets: Offers great control but harder to install.
The sizes, too, cannot be neglected while picking out guitar frets. Generally classified by height and width – tall-narrow ones make it easier for pressing down on strings whilst wide-tall ensure less contact with wood under normal pressure allowing quicker playability.
- Narrow-Tall Frets: Pressure-friendly thus perfect for newbies.
- Wide-Tall Frets: Allows speedy playability ideal for seasoned players.
Ultimately though, remember that there’s no one-size-fits-all solution here – every guitarist has unique preferences!
Accurately Installing New Frets without Damaging your Guitar
A guitar is more than an instrument, it’s an extension of your soul. Therefore, when the time comes to replace old or worn-out frets, you want to do it properly without causing any harm to your beloved companion: the guitar body and its neck. Installing new frets can be a tricky process and if done inaccurately, might lead to detrimental effects on the overall sound quality and playability of your guitar.
To ensure that no damage is inflicted upon your cherished instrument during refretting,
keep in mind these crucial steps:
- Prepare: Thoroughly clean the fingerboard using a mild soap solution before starting with anything else. This will help in easy removal of old frets.
- Heat Up: Slightly heat up the fret wire using a soldering pencil which loosens up any stubborn glue holding them together.
- Pull Out Carefully: Be very gentle while pulling out each individual fret from both ends using pliers; this significantly reduces chances of chipping off wood from your fingerboard.
- Fingerboard Smoothing: Use fine grit sandpaper for smoothing any leftover residue on fingerboards before installing new ones.
Note: Always move in direction parallel with strings so as not to scratch against grains!
Accurate installation ensures longevity not only for newer accessories but also safeguards existing structures within your trusted tool – ensuring every note strummed reverberates smoothly through air! It’s all about taking care of those small details as they cumulate into one harmonious whole – much like how every beautiful melody emerges from individual musical notes carefully placed together.
You may also like: freddie mercury yamaha piano
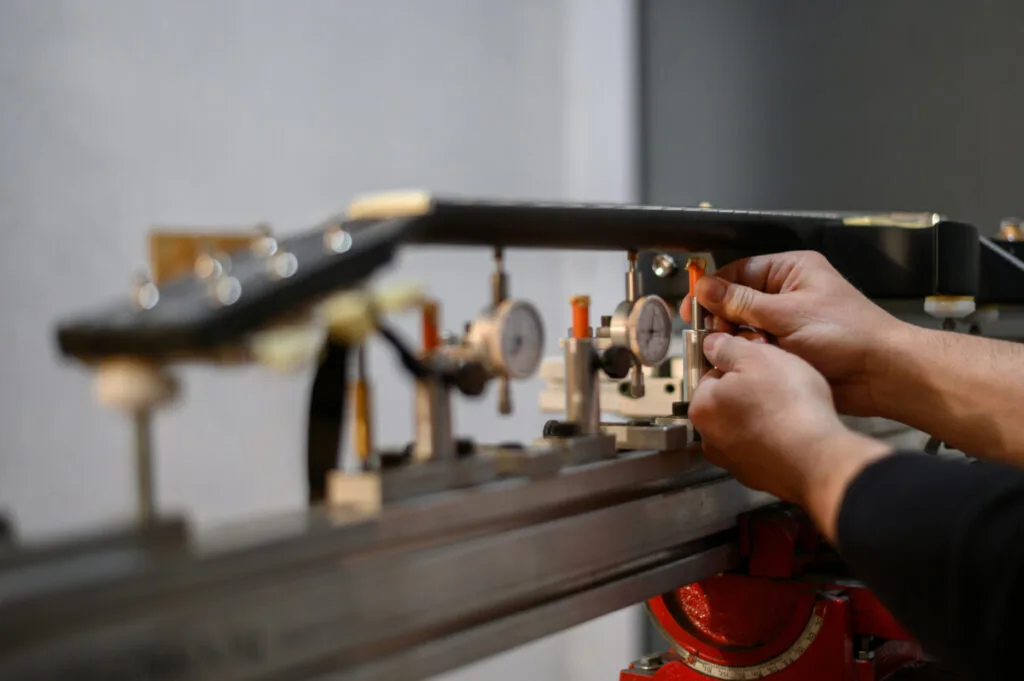
Polishing and Setting Up Your Newly Refretted Guitar for Optimal Playability
When you’ve just finished the labor-intensive process of refretting your guitar, it’s time to dive into the final steps: polishing and setting up. Done right, these important last touches will make your strings sing with a clarity that brings joy to both player and listener.
Polishing is not merely cosmetic – although it does help add a shiny finish to your frets. The goal here is to ensure each fret top is as smooth as possible for easy string bending and improved comfort when pressing down on them.
Start by masking off the fingerboard area using low-tack tape or painter’s tape around each fret. This will protect the wood while you work on polishing each one with ultra-fine steel wool or micro mesh pads, moving from lower grits (coarse) upwards towards higher grits (fine). You’ll find that this meticulous attention to detail truly pays off in optimal playability.
After painstakingly smoothing out every last millimeter of those fresh frets, turn now towards setting up. Your goal? A harmonious balance between tension, intonation and action – all key components contributing to optimal playability.
- Action: Adjusting the saddle height can affect how high or low the strings are from your fretboard – known as ‘action’. Too high might be cumbersome for fast playing; too low could cause annoying buzzes.
- Tension: The truss rod adjustment affects neck bow which influences string tension. It’s ideal checking after tuning at concert pitch since changes in tuning can affect neck relief.
- Intonation: Fine adjustments at bridge saddles position helps correct slight discrepancies in pitches produced at different places along scale length.
In wrapping things up, remember that perfecting these details may take time but they’re crucial for achieving an instrument that plays as good as it looks. Your newly refretted guitar deserves no less!
Conclusion: Embracing DIY Guitar Maintenance Skills – Guitar Refretting
Embracing DIY Guitar Maintenance Skills – Guitar Refretting
There’s something truly magical about refurbishing your own guitar, particularly when it comes to refretting. This fine art gives you the chance to breathe new life into your beloved instrument, making it sound as good as new. Imagine pulling out a slightly worn-out string from its groove on the fretboard, then aligning and fixing a fresh one in its place – all by yourself. It’s like performing heart surgery on your cherished musical companion.
Here is what you need to know:
- Fret puller: A special tool specifically designed for removing old frets without damaging the fretboard. These usually have thin jaws that can easily slide under each fret.
- Fret cutter: Another specialized tool used for trimming down new fret wires before fitting them into their slots.
- Fingerboard guard: This protective metal piece shields the rest of the fingerboard during refretting process.
Don’t let initial apprehension hinder you! As with any skill worth acquiring, practice makes perfect when it comes to mastering guitar maintenance tricks like refretting. So next time your six-string friend sounds off tune or those threads look lacklustre; roll up those sleeves and fix ’em up!</p