
Are you the proud owner of a vintage motorcycle? Do you want to bring it back to its original glory, starting with its headlight? I understand- there’s something special about owning and riding an antique motorcycle. And as a fellow enthusiast, I know how important it is to have every detail perfect, especially when it comes to that iconic headlight.
In this article, we’ll delve into everything you need to know about antique motorcycle headlights – from their history and types, to restoration techniques and maintenance tips. Whether your goal is to showcase your vintage bike at shows or simply enjoy the nostalgic ride on the open road, this guide has got you covered. So let’s get started and give that antique motorcycle headlight the love and care it deserves!
So, antique motorcycle headlight?
Restoring and maintaining an antique motorcycle headlight is a task that requires patience, attention to detail, and some basic mechanical skills. But with the right tools and knowledge, it can be a rewarding experience for any enthusiast. In this guide, we will walk you through the steps of restoring and maintaining your antique motorcycle headlight.
Firstly, it is important to understand the different types of headlights used on older motorcycles. The most common types are acetylene gas lamps and electric bulbs. Acetylene gas lamps were popular in the early 1900s but were later replaced by electric bulbs which are still widely used today.
To begin restoration, start by carefully disassembling the headlight. This includes removing the lens, reflector, bulb holder, wiring harness (if present), and any other components attached to it. It is crucial to take note of how each component was assembled as this will make reassembly much easier.
Next comes cleaning all parts thoroughly using a mild soap solution or specialized cleaners for metal surfaces. Be gentle when handling delicate parts such as lenses or reflectors to avoid causing any damage.
If your headlight has an acetylene burner assembly, check if there are any cracks or leaks in the hoses or fittings. Replace them if necessary before moving on to polishing all metal parts with a suitable polish product.
For electric bulb headlights, inspect the wiring harness for any frayed wires or loose connections that may cause issues with lighting up properly. If needed, replace old wires with new ones following proper electrical safety measures.
Once all individual parts have been cleaned and polished/ repaired if needed, reassemble them carefully in reverse order of disassembly. Make sure everything fits snugly together without forcing anything into place.
Finally comes maintenance tips for keeping your restored antique motorcycle headlight in good condition for years to come:
– Regularly clean off dirt buildup from lenses using a soft cloth.
– Check electrical connections periodically to ensure proper functioning.
– Replace bulbs when they burn out to maintain optimal lighting.
– Store the headlight in a dry and cool place when not in use.
In conclusion, restoring and maintaining an antique motorcycle headlight requires attention to detail, patience, and some basic mechanical skills. But with proper care and maintenance, your restored headlight will continue to shine for many more years to come.
Understanding the Different Types of Antique Motorcycle Headlights
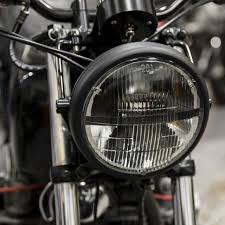
When it comes to antique motorcycles, the headlights are not just practical features; they’re charming artifacts that reflect the era of their design. Early motorcycle headlights were often simple and functional, typically made from brass or polished aluminum. These lights used incandescent bulbs and reflected light through glass lenses shaped like teardrops or more ornate designs. The “bowl” shape was very common in the early 1900s, offering a vintage vibe that perfectly matched the classic aesthetics of those machines. With advancements in technology over time, newer models introduced electric lighting systems, changing both functionality and appearance.
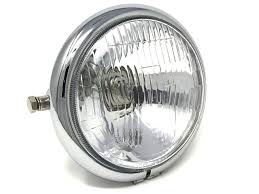
As motorcycle manufacturing evolved, so did headlight styles. By the 1920s and ’30s, manufacturers began experimenting with more intricate designs that incorporated elements like chrome plating for added flair. Many models featured dual headlights for improved visibility at night—an exciting innovation back then! Today’s enthusiasts often seek out these distinct styles because they tell a story about early motorcycling culture and craftsmanship. If you’re diving into restoring an antique bike or simply appreciate their beauty, understanding these variations can enhance your connection to history.
From elegant period-specific shapes to rugged constructions meant for long-distance rides on gravel roads, each type of headlight represents a unique part of motoring heritage worth celebrating.
Read also: aluminum motorcycle wheel chock
Restoration Techniques for Antique Motorcycle Headlights
Restoring antique motorcycle headlights is a fascinating journey that melds craftsmanship with a deep appreciation for history. The process typically begins with careful disassembly, where each component—such as the glass lens, chrome housing, and wiring—is examined closely. Using solutions like mild soap and water or specialized cleaning agents can remove decades of grime without causing damage. For those stubborn spots on the lens, fine-grade polishing compounds work wonders, bringing back clarity to what was once clouded by age.
After cleaning, it’s vital to address any rust or corrosion present on metal parts; using sandpaper or wire brushes can help reveal shiny surfaces again.
Next comes reassembly and electrical restoration. Replacing old bulbs with modern LED equivalents not only improves visibility but also respects energy efficiency in line with contemporary standards. Ensuring proper sealing is crucial; rubber grommets may need replacement to keep moisture out and prolong the life of your headlight system. Finally, aesthetic touches such as re-chroming metal parts can enhance visual appeal while maintaining authenticity. Once restored properly, these headlights don’t just illuminate the road ahead—they shine bright as symbols of an era gone by! Whether displayed in a collection or used on the open road, they carry stories waiting to be told through their revived glow.
Maintenance Tips to Keep Your Vintage Motorcycle Headlight Shining Bright
Keeping your vintage motorcycle headlight shining brightly is essential for both safety and aesthetics. First off, regular cleaning is key. Dust, grime, and road debris can dull the lens over time. Use a soft cloth and gentle soap to wipe away any dirt without scratching the surface. If you notice that the glass has become cloudy, consider using a specialized plastic or glass polish to restore its clarity. Just apply it with care in circular motions until the shine returns. Also, don’t forget about the gaskets around your headlight; these should be checked regularly for cracks or wear that might allow moisture to seep in.
Another important aspect of maintenance involves checking your bulb and electrical connections. Over time, bulbs can dim or burn out completely due to normal usage or corrosion at contact points. Make sure you replace any faulty bulbs with ones specifically designed for vintage motorcycles—this ensures proper fitment and brightness.
It’s also wise to inspect wiring harnesses for frays or rust which could lead to poor connectivity.
Keeping connections clean will help maintain consistent power flow,
ensuring that your light remains bright as day on those evening rides through winding roads and quiet towns.
A little regular upkeep goes a long way in preserving both functionality and charm!
Troubleshooting Common Issues with Antique Motorcycle Headlights
When it comes to vintage motorcycles, the headlights are not just practical; they also contribute significantly to the bike’s charm and character. However, these old lights can sometimes be troublesome. One of the most frequent issues is flickering or dim lighting. This problem may stem from a weak connection in the wiring harness, which could have corroded over the years. Checking for loose wires and cleaning any rusted connections can often help restore brightness and reliability. Additionally, consider inspecting the bulb itself; antique motorcycle bulbs can wear out like anything else, so replacing an old bulb might do wonders.
Another common concern is foggy or yellowed lenses that obscure light output. Over time, age takes its toll on glass and plastic components alike. To improve visibility and enhance your motorcycle’s aesthetic appeal, try using a gentle cleaner specifically designed for plastics or glass with fine grit sandpaper to buff out scratches carefully—this method should bring back some clarity without damaging the original surface too much. Furthermore, if you discover cracks within your headlight lens assembly, these defects could lead to water ingress during rainstorms—certainly something worth addressing! Ensuring your antique motorcycle’s headlights function properly not only enhances safety but also preserves their classic allure on every ride down memory lane.
You may also like: what guitar does slash use
Preserving the Value and Authenticity of Your Vintage Bike’s Lighting System
When it comes to vintage bikes, the lighting system is not just a functional element; it’s a piece of history. These original components can tell stories of the past, shining light on both the journey and craftsmanship that went into creating them. To preserve their value and authenticity, careful attention is necessary. First, keep your bike stored in a dry area away from direct sunlight to prevent any fading or corrosion of materials. Regularly check for signs of wear—like frayed wires or dim bulbs—and address these issues gently rather than replacing parts with modern equivalents. Instead, consider refurbishing existing pieces whenever possible; this maintains originality while still ensuring functionality.
Additionally, understanding how to maintain these systems can greatly enhance their lifespan. Use gentle cleaning methods, like soft cloths and mild soapy water, avoiding harsh chemicals that could harm vintage finishes. If you decide to add new lights for safety reasons during night rides, opt for options that harmonize with your bike’s original aesthetic instead of overpowering it with modern designs. Keeping records of repairs and changes will also bolster your bike’s story and increase its overall value if you ever choose to sell it down the line.
Preserving a vintage bike’s lighting isn’t merely about keeping things functional—it’s about honoring its heritage while enjoying every ride lit by its unique glow.